Support Document
 Support Document
How UPC scanner works?
Scanner setting is for set digit at time of scanning. In bill cashier ring up items with the scanner.
If from the setting module if a digit is set then in cash register scanner will affect at the time of item scanning.
There are four(UPC-A, UPC-B, UPC-C, UPC-D) scanner which you can set according to requirement.
You can set the same setting with other three scanners with various digit limit of the barcode
When both the option ON(leading and check digit) Then automatically digit barcode option set ON.
When you add a new item with 10 digit barcode then also according to setting that barcode will add.
Have entered 10 digit barcode in item
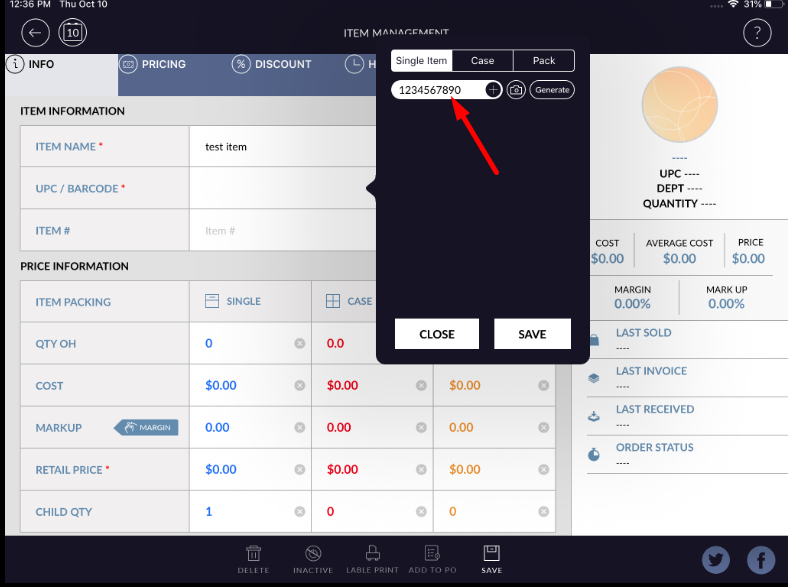
It will enter with eight-digit as first and last digit will remove.
The same thing will apply when search or ring up or scan an item from anywhere in the whole application.
If from the setting module if a digit is set then in cash register scanner will affect at the time of item scanning.
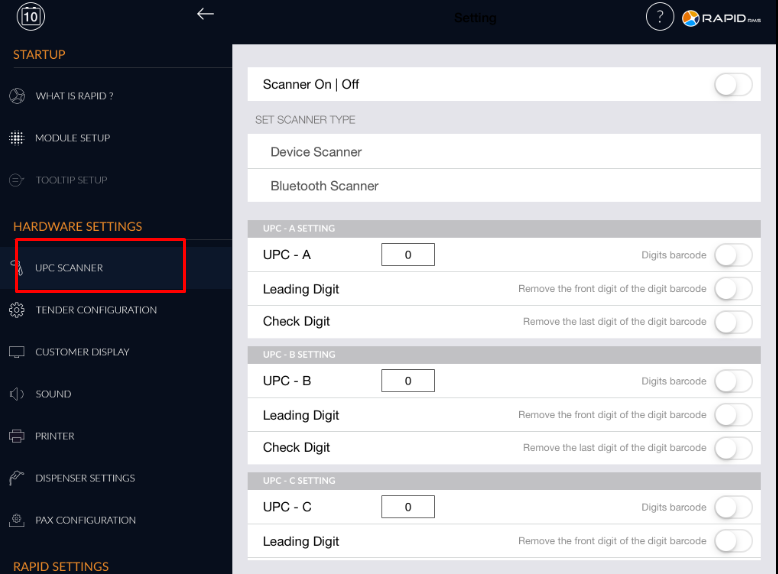
- Open rapid RMS application.
- Go to the setting module.
- Select a UPC scanner.
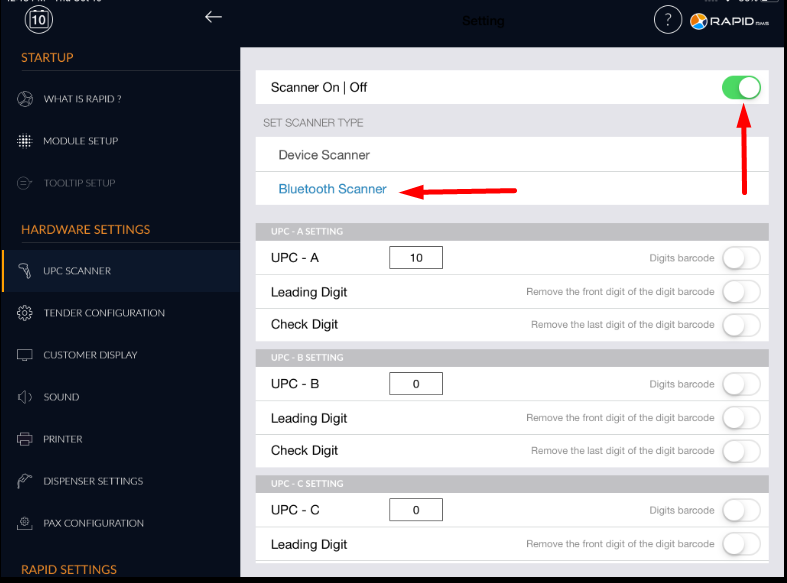
- If scanner option is ON then only we can select an option from either device scanner or Bluetooth scanner.
- After scanner ON you can connect a scanner with the system.
For set digit in barcode follow below procedure.
There are four(UPC-A, UPC-B, UPC-C, UPC-D) scanner which you can set according to requirement.
- Set any digit limit in the scanner. I.e 10 that means if the original barcode is of 10 digits on which this setting will apply.
- Turn ON button of Digit barcode.
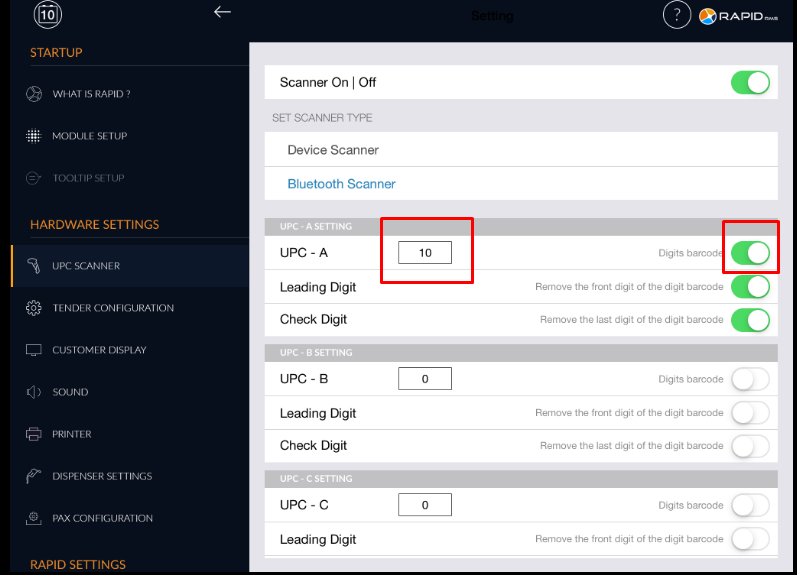
- There are two other option leading digit and check digit.
- When leading digit option ON, that means remove front digit of the barcode. I.e if our original barcode is of 10 digits and we scan item then if last 9 digit match with scan barcode then also the item will ring up. The first digit will be ignored.
- When check digit option ON, that means remove the last digit of the barcode. I.e if our original barcode is of 10 digits and we scan item then if first 9 digit match with scan barcode then also the item will ring up. The last digit will be ignored.
You can set the same setting with other three scanners with various digit limit of the barcode
When both the option ON(leading and check digit) Then automatically digit barcode option set ON.
When you add a new item with 10 digit barcode then also according to setting that barcode will add.
Have entered 10 digit barcode in item
It will enter with eight-digit as first and last digit will remove.
The same thing will apply when search or ring up or scan an item from anywhere in the whole application.